Weeknotes #9: Mostly Software
Anyone following closely might notice I’ve skipped a couple of weeks. I’ve found it hard to keep up with the week notes, so I decided to pause and focus on the projects themselves.
For the past two weeks, I’ve been almost exclusively focused on software as I continued the process of setting up automated builds and releases for Fileaway and Bookmarks. Hopefully this will make it much easier to add to these apps in the future, and allow me to maintain the myriad software I’ve put together over the years. Since it’s been a bit difficult to keep up the momentum during this process (tooling is so much easier to build when other developers benefit from what you put together), I took a little time out to write yet another Mac app that augments the little-known built-in macOS Smart Folder functionality, and dabbled in some more industrial design, with a case for the MiSTer.
Changes: Semantic Versioning and Automated Releases
As I discussed briefly in my most recent weeknotes, I managed to get both Fileaway and Bookmarks building signed and notarized macOS binaries using GitHub Actions. Having done that, I set about working out how to automate the release process itself.
In order to automatically synthesise and publish releases, I needed a couple of extra things: version number, and release note generation. Fortunately these two things can come together in the form of Semantic Versioning and Conventional Commits. The idea is that if you have rich, predictable commit messages, you can automatically synthesise a version number from the commit messages.
First up, Conventional Commits provides a lightweight, clear way the indicating the details of a change. For example,
fix: A fix for something that was broken
feat: A shiny new feature
docs: Documentation changes
fix!: A fix that breaks backwards compatibility
feat!: A new feature that breaks backwards compatibility
Next, Semantic Versioning defines a set of rules for how the different types of changes (fix, feat, docs, … etc) update the version number. There are some subtleties around pre-release versions, but in the common case, it looks something like this:
| Current Version | Changes | New Version |
|---|---|---|
| 1.0.0 | > 1 fixes | 1.0.1 |
| 1.0.0 | > 1 features >= 0 fixes |
1.1.0 |
| 1.0.0 | > 1 breaking changes > 1 features >= 0 fixes |
2.0.0 |
With these rules, you can then decide whether you wish to publish on every change (a flow that can work well when you control the entire path to the customer), or collect changes together and publish in batches (which works well for things like the App Store which have a secondary review process). Semantic Versioning yields a sensible version number in both scenarios.
Unfortunately, digging into the tooling for Semantic Versioning, it became immediately clear that the current offerings are very prescriptive—most expect you to follow a specific language’s release process (e.g., NPM packages, … etc), or have very strict ideas about changes should be stored in the repository. Since I hope to make use of Semantic Versioning in a number of projects with very different lifecycles, I wrote my own tool which is (hopefully) a little less opinionated.
Changes, provides a set of commands which are designed to let you assemble own release flow, offering three basic pieces of functionality:
- output the new version number
- output the release notes
- tag the repository with the new version number, and (optionally) run a user defined script to publish the release
For Fileaway and Bookmarks, I use Changes to inject the version number into xcodebuild when building the apps, and then provide a custom script to the tagging operation that uses the GitHub CLI to publish any new releases to GitHub on every main branch build on GitHub Actions. It works well.
One further point to note is that, while many tools expect you to commit updated release notes, or version numbers back into the repository when making a release, Changes doesn’t work this way: it synthesises versions and release notes from just the commits and tags alone. This makes the release (and re-release) process much simpler as you never have to worry about the build / release ordering; since the source doesn’t change during release, it’s safe and completely valid to simply tag and publish a release after the build has been made and validated.
You can find out more about Changes on GitHub. Documentation is a little sparse right now, but I’m always happy to answer questions, improve documentation, accept issues, and review PRs.
Fileaway
With automated releases in place, I took some time to add one of my highest priority features to Fileaway: multiple locations.
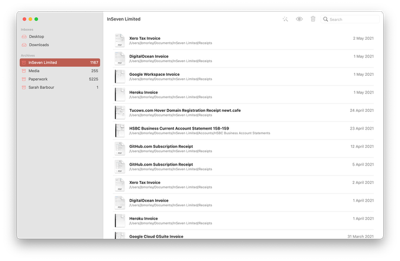
Fileaway with multiple inbox and archive locations in the sidebar
Until now, Fileaway has only allowed users to set single inbox and archive locations. Since macOS establishes a convention where both the Desktop and Downloads serve as temporary work directories, it’s very natural to—at the very least—want both of these as inbox locations. Personally, I also like to have multiple archives locations, separating my personal and corporate documents.
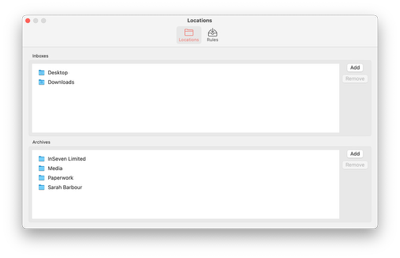
In order to support multiple locations, it was necessary to update Settings to present lists of locations for both the inbox and archive categories, and update the Rules tab to enable per-location rule sets. Since this whole design makes locations more fluid, and more likely to change as users hone their workflow, it was also a good time to address a bug stopping the app updating automatically when locations changed.
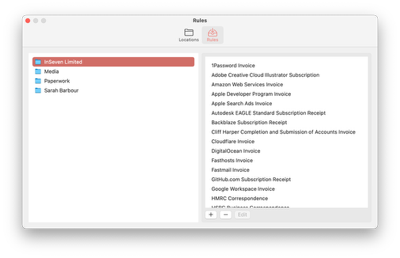
The rule editor lists rules by archive location
When adding support to the Rules Wizard, it was important to continue to keep the number of steps to file a document down to a minimum—it’s unacceptable to add another screen to select the archive location as this adds an additional click. To keep things simple, I added the name of the destination archive below each rule in the rule section list which removes ambiguity and keeps the number of steps to file a document the same.
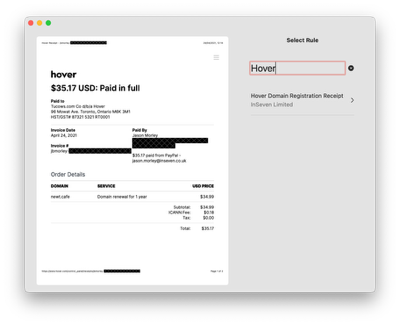
The Rules Wizard now shows the destination archive underneath the rule name
In the future, I’d like to add ‘All Inboxes’, and ‘All Archives’ entires in the sidebar of the main window to make it easy to quickly see content across all locations. Under-the-hood, I plan to implement that in a way that’s easy to extend to user-configurable smart folders. I’d also like to take the time to set up a dedicated website for Fileaway where I can host the auto-generated release notes from my Changes tool, along with a clear download link.
You can download the latest build of Fileaway from the GitHub Releases page.
Multifolder
I recently discovered macOS Smart Folders. They’re a little-documented feature of Finder that allows you to define a special ‘folder’ containing files conforming to a collection of rules. It’s a lot like the ‘Smart-’ filter functionality found in many Mac apps (Mail, Music, Photos, … etc.), and I use it to filter a collection of nature photos to find ones suitable for my desktop background.
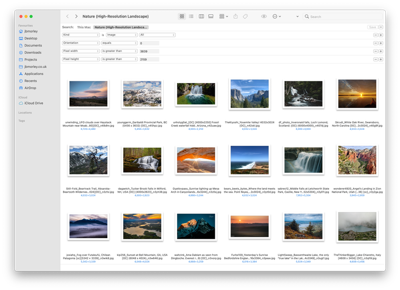
Smart Folders are a great way to filter on file details like image orientation or size
The choice of rules you can apply to Smart Folders is impressively comprehensive, but they’re lacking in one key area: you can only select files from either a single folder, or the whole Mac; there’s no way to show files from within a number of directories.
After some digging, I discovered this is simply limitation of the editor: Finder will happily display Smart Folders with multiple search directories; you just can’t add them. Obviously this seemed like a problem desperately waiting to be solved so, when I realised that Smart Folders are simply plist files, I set about writing a lightweight app to let me edit the search directories. It’s called Multifolder (think ‘Leeloo Dallas Multipass’).
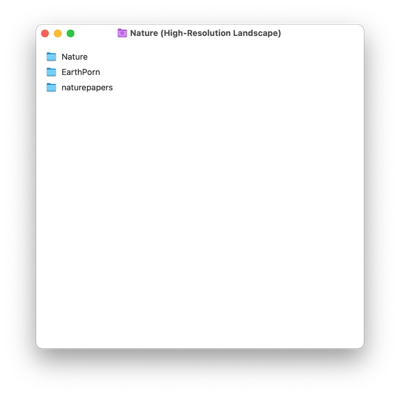
Viewing a Smart Folder in Multifolder lets you easily edit the directories it searches
Like Bookmarks and Fileaway, Multifolder is open source, and fully set up for automatic build and release (it only took half a day to set up this time around 😅), and I’m always open to contributions and pull requests. It’s the first time I’ve written a document-based app so there are still a few rough edges where I’ve not fully grasped the framework, but it functions for my needs, and I’m pretty pleased with it.
I’d love to find a graphic designer to help design an icon for Multifolder. In the meantime, I’ll probably throw together an SF Symbols based one as I have with many of my other apps.
You can find Multifolder on GitHub, and you can download it here.
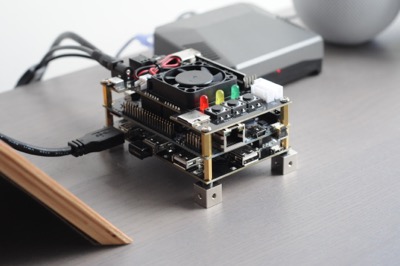
MiSTer Case
I’ve not really spent much time using the MiSTer these past few weeks, other than to keep an eye on an interesting discussion about vector graphics output that really makes me want to get back to my laser-based Vextrex emulator. I did however, start designing my own custom MiSTer case.
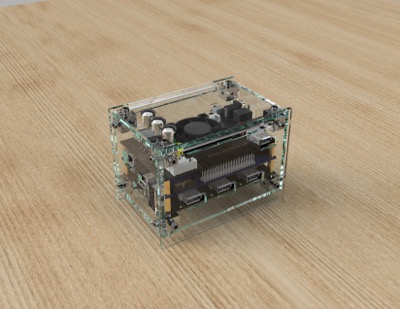
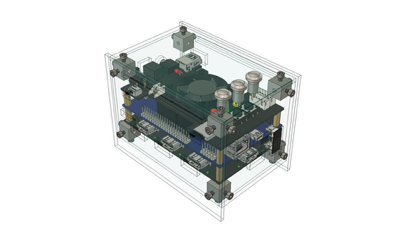
The MiSTer case in all of it’s rendered glory
While there’s no shortage of cases on Etsy, the choices are pretty much equally split between extrusion-based prints, and laser-cut acrylic; neither of which appeal to me. Extrusion prints, while practical, always look messy, and the challenge of jointing acrylic tends to lead to an excess of tabs and overhangs, resulting in clunky, cumbersome designs1. There are also a couple of more ‘official’ cases (if that’s even possible): a PCB case, and an aluminium case. The PCB panel case is very clever but not to my taste, and the aluminium case looks great but is unsurprisingly out of stock. Given the dearth of options, I thought I’d design my own.
Personally, I like designs with crisp, sharp lines, uninterrupted surfaces, and as little visual noise as possible. Having already tried my hand at achieving this using laser-cut acrylic with my take on Adafruit’s Thermal Printer, I focused my efforts there. I spent a couple of hours searching the Internet for ways to joint the panels without needing tabs or cutouts, and came cross these small construction cubes with M3 threaded holes in the centre of all 6 sides:
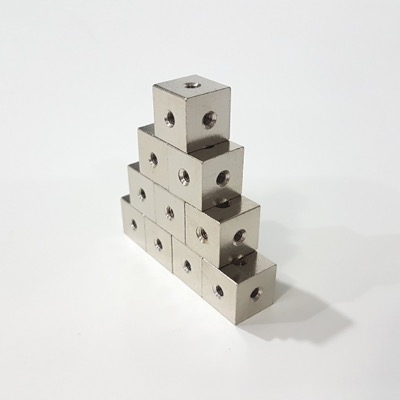
In some places, these seem to be known as ‘ square standoffs’, and they will form the corners of my case. I found them through Toma Fabrications who, entertainingly, use them exactly the way I plan to myself, creating acrylic cases for PCs and other electronics (their MITX 120 Computer Case looks fantastic).
Since the cubes threaded on all 6 sides, and even use the same M3 holes as the DE-10 Nano and MiSTer PCBs, I can mount the MiSTer’s standoffs to the top of the bottom 4 cubes, giving me a way to secure the MiSTer itself in the case:
The MiSTer can attach directly to the cubes that will form the bottom 4 corners of the case
Having decided upon an approach to constructing the case, I set about modelling the case in Fusion 360 to give myself the best shot at getting all the parts to fit together nicely. Fortunately, someone has uploaded a CAD model of the DE-10 Nano (the MiSTer’s mainboard) to Thingiverse, and models of recent versions of the support boards are available in the MiSTer hardware repository. This allowed me to assemble the full MiSTer in Fusion, and then project the profiles of the various ports onto the case panels to determine exactly where the cutouts should be. Of course, this relies on the models I’m using being accurate, but they look pretty good from what I can see.
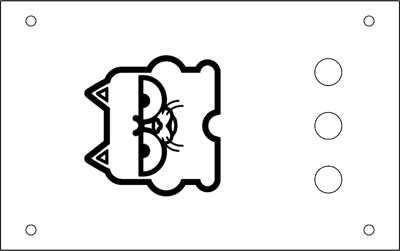
After this, I exported the panel profiles for laser cutting, and printed them out to scale to let me do a fit test against my actual MiSTer before ordering the parts from Ponoko.
I couldn’t resist ordering a second top panel with the MiSTer-kun, the project’s adorable grumpy cat mascot laser engraved on the back of the panel. I’ve found laser engraving to give mixed results so I’m hedging by ordering the plain panel too, but this is the one I hope to be able to use:
It’ll take about 2 weeks to get the parts back from Ponoko, and I’m excited to see how it all turns out. Until then (and as always), you’re more than welcome to check out the project on GitHub.
-
The Pibow, which dominated the early Raspberry Pi case scene (and I copied to make a hard drive case), actually did a great job of embracing this by using layers of multi-coloured acrylic. Unfortunately, it wastes a lot of material, so it doesn’t work well for large designs, and still has a somewhat ‘toy box’ aesthetic. Perfect for a Google office. 🙃 ↩